If you look up “how to compost” online, you will find complex ratios, precise temperature charts, and instructions for building elaborate rotating barrels. It can be overwhelming. The truth is, nature has been composting long before humans started measuring carbon-to-nitrogen ratios.
You don’t need a PhD in soil science to turn your kitchen scraps into garden gold. You just need a reliable method that mimics nature. This guide strips away the confusion and gives you the only compost recipe you actually need: one that is simple, smell-free, and produces nutrient-rich soil in months, not years.
Why This Recipe Works: The Greens and Browns Balance
The secret to fast, hot compost is balance. Microorganisms that break down your waste need two main things to survive: energy (Carbon) and protein (Nitrogen).
- Greens (Nitrogen): These are materials that decompose quickly and release moisture. Examples include vegetable scraps, fruit peels, coffee grounds, and fresh grass clippings.
- Browns (Carbon): These are materials that decompose slowly, add bulk, and keep the pile aerated. Examples include dried leaves, cardboard, paper, straw, and sawdust.
If you have too many greens, your pile will become a slimy, smelly mess. If you have too many browns, the pile will sit dormant and dry. The recipe below balances these perfectly.
The Ingredients: What Goes In
To keep things simple, we are going to aim for a visual ratio rather than a weighing scale. You want roughly 2 parts Brown to 1 part Green by volume.
The Green List (Nitrogen Source)
- Vegetable scraps (peels, ends, cores)
- Fruit scraps (avoid citrus and onions if you want to be worm-friendly, but they are fine for general compost)
- Coffee grounds (filters included)
- Tea bags (staples removed)
- Fresh grass clippings
- Plant trimmings (from healthy plants)
The Brown List (Carbon Source)
- Dry leaves (save them in the fall!)
- Cardboard (unprinted shipping boxes or toilet paper rolls)
- Brown paper bags
- Straw or hay
- Sawdust (from untreated wood)
- Shredded newspaper (non-glossy)
- Eggshells (crushed)
What NOT to Add Never add meat, dairy, oils, or pet waste (dogs or cats) to a standard backyard pile. These attract pests and create odors.
Step-by-Step Instructions
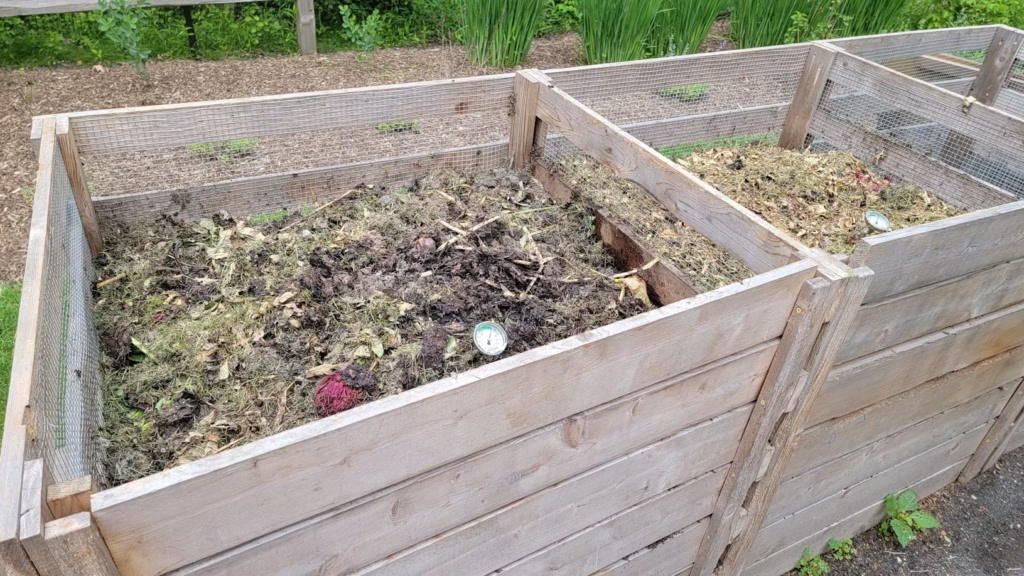
Step 1: Choose Your Container You can use a simple wire mesh bin, a plastic tumbler, or just a pile on the ground. The key is location: pick a spot with good drainage and partial sun. The heat helps the microbes work faster.
Step 2: Lay the Foundation (The Brown Base) Start with a thick layer (about 4 to 6 inches) of coarse brown materials, like small twigs or straw. This allows air to circulate underneath the pile so it doesn’t turn into a soggy mat.
Step 3: Add Your Kitchen Scraps Add your green layer—your daily kitchen scraps. Spread them out so they aren’t clumped in one giant ball.
Step 4: Cover with Browns Cover the greens immediately with a layer of brown materials (leaves or shredded paper). This layer should be roughly twice as thick as the green layer.
- Why this matters: This “cap” acts as a filter. It keeps fruit flies away, masks any odors, and balances the moisture.
Step 5: Repeat and Moisten Continue layering: Browns, Greens, Browns. Every time you add a layer, check the moisture. Grab a handful of the mix and squeeze it hard.
- Too Wet: Water streams out between your fingers. Fix: Add more browns.
- Too Dry: The pile falls apart dustily. Fix: Add water or more greens.
- Just Right: It feels like a wrung-out sponge—moist, but no dripping water.
Step 6: Aerate (The “Turn”) Once your pile is built (or when your bin is full), you need to get oxygen into the center. Use a pitchfork or a compost aerator tool to mix the pile. Turn the outside edges into the center.
- Frequency: Turning it every week or two will produce compost in a few months. Never turning it will still work, but it might take a year.
Troubleshooting: Common Issues
Even with the best recipe, things can go slightly off. Here is how to fix it:
- It smells like rotting eggs: This means it is too wet and lacks oxygen. Turn the pile immediately and add a significant amount of dry brown material (straw or cardboard).
- It’s not heating up: The pile is likely too dry or lacks nitrogen. Add water and mix in more green materials (grass clippings or coffee grounds work great).
- I see bugs: Pill bugs and ants are normal decomposers. If you see an explosion of fruit flies, you didn’t cover your greens enough. Bury the food scraps deeper under brown material.
How to Know When It’s Done
Finished compost is dark, crumbly, and smells like earthy forest floor. You shouldn’t be able to recognize any of the original ingredients (though an occasional eggshell shard or avocado pit may persist).
You can use it immediately, but letting it “cure” for a few weeks in a separate bag or pile allows the microbial activity to stabilize, making it even healthier for your plants.
Conclusion
Composting doesn’t have to be a science experiment. By sticking to the simple rule of covering your green kitchen waste with twice as much brown material, you can reduce your waste and create the best possible fertilizer for your garden.
Start your pile today. In a few months, you’ll be holding the result: black gold that your plants will love.
No comments yet. Be the first to share your thoughts!